Posted on Leave a comment

How to provide tender care to your plants during summer

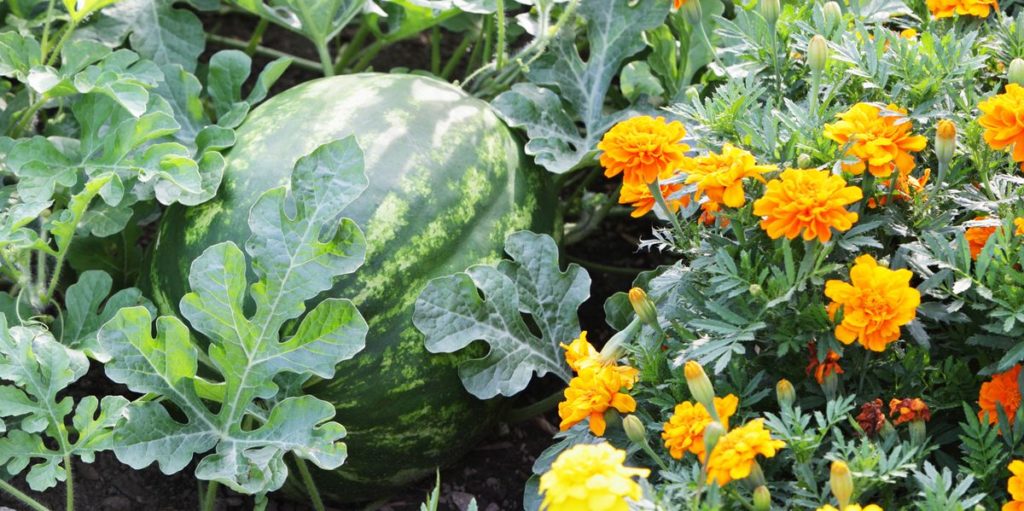
Sweltering summer brings many delights such as luscious mangoes, watery watermelon and musky muskmelon to soothe our body from rising temperature. Although WE have ample of options to skip the searing heat of Sun but the Plants do not have. They consumes neither own fruits to keep themselves hydrate nor can walk to a shady place to avoid the sun. Hot, dry wind elicits massive moisture loss from Plant’s verdure through evaporation which results into drying and wilting of leaves. Therefore, your garden plants solicit special attention & care from you during summer.

Reorganize your garden for the summer!

Plants can withstand hot, dry summer better if proper care and maintenance is pursued. WE propagate following summer gardening habits to protect plants grappling with heat stress.

1.Dusk & Dawn Rule: When, How Long and How often to Water?

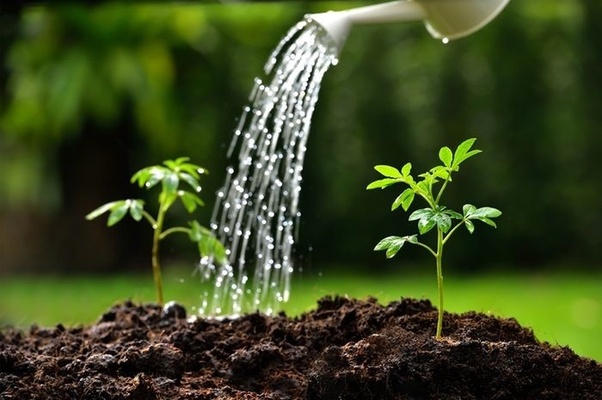
The plants should be watered early morning or in evening preferably before 7 AM or after 6:30 PM to proffer them good vigour.

Majorly it depends upon water retaining capacity of soil/media and how fast that moisture is being utilized? Water it to maintain favorable moisture content and not to get waterlogged.  Regularly monitor the moisture level in the soil.

2.Location of The Plant:

Location plays a crucial role. Shady area curtails the summer stress for heat and intense sunlight sensitive plants. Along with it, the exposure towards winds should be considered when shifting plants as sensitive plant’s foliage may burn by hot, drying air movement.

              Alternatively, you can provide a shade cloth(green or white) to shield your plants from the scorching sunlight.

3.Weekly Pruning:

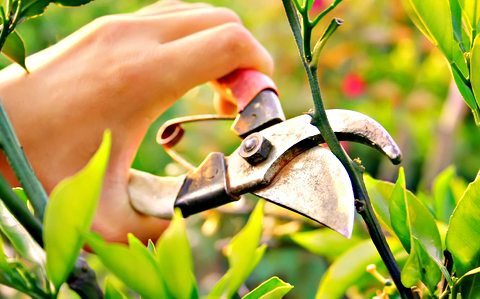
Trim your plants by cutting dead-dried branches, drying or diseased leaves and twigs once in a week to boosts its growth.

4.Mulching:

Hot soil shackle plant growth. Especially for shallow-rooted and pot plants it becomes more severe as deeper thriving roots can penetrate to a level of reduced soil temperature and more moisture content. Mulching the surface of soil helps in reducing soil temperature, retains soil moisture for a long time and prevents weeds.

Mulch Materials:

It can be bark of the tree, grass bits, sawdust, dried leaves, compost, onion and garlic skins, straw, clayballs and old cooler grass (mats of Khus) etc.

Replace the mulch when you see any sign of decomposition.

5.Rendering continual supply of Nutrients:

In hot weather, the nutrient reserves of plants are exhausted at much higher rate. Declining nutrient level may hamper plant growth and their deficiency symptoms quickly appear. Therefore the nutrients should be added frequently.

         Composting would help in restoring nutrients reserve. Besides, there are few quick hacks that would replenish the nutrients rapidly.

Such as:

I) Curd Fertilizer:

Prepare a mixture of curd and water in a mud pot and then insert a copper spoon into the mix. Leave it for 10-15 days during which the white color of curd will turn into green.  Dilute it with water and spray.

II)Milk as a Fertilizer:

Either use 100% milk or dilute it with water. Spray it (preferably raw milk) on the soil. It also improves soil health.  As we all know it is a proven source of calcium and it contains other beneficial proteins, vitamins and micronutrients which can boost up plant growth.

III)Wood Ash:

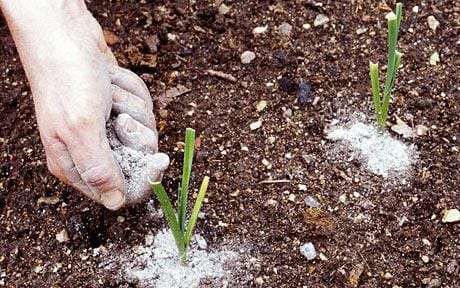
It is a valuable source of nutrients. Wood Ash has a high potassium content which emboldens flowering and fruiting. It also contains phosphorous as well as several micronutrients including manganese, iron, zinc and calcium.

     Younger wood, such as twigs carries high amount of nutrients than older woods. Burning your trimmed twigs, dead wood or leaves might be worthwhile.

6.Protection against Diseases:

Protecting plants from microbial infestation and insect attack becomes very necessary for survival of the plant. Spraying Neem oil over the plant guards it against many disease causing agents. Additionally, Milk can be used to control aphids, thrips, spider mites as well as an fungicide to prevent molds, rot and powdery mildew up to a certain extent.

Plants frequently wilts in hot weather which is followed by dangling of both leaves and flowers. The necessity of tender care becomes more prominent in summer. WE hope that this constructive information will help you to preserve your garden lush green All Summer Long!

Posted on Leave a comment

Wondrous Wheatgrass: An Elixir to Rejuvenate Yourself!

India has a prodigious knowledge of herbal medicines. Since ancient times, Wheatgrass has been used to treat various diseases and disorders. Wheatgrass or widely known as Green Blood owing to a splendid chlorophyll content is the young fresh sprouted first leaves of the wheat plant. Its linear-lanceolate leaves are rich repository of antioxidants, 17 amino-acids, vitamins, minerals and proteins. Further, the blades of wheatgrass are too facile to grow from the wheat kernels available in every household.

Prevention of Diseases with GOOD NUTRITION:       

WE believe that “Prevention is always better than cure”. A punctilious intake of recommended vitamins, mineral and other nutrients that our body needs plays a pivotal role in keeping body & mind healthy. But the juggling life in today’s frenetic world makes it difficult. For this concern, Wheatgrass is the solution.

Nutritional Scanning –

An Army of Antioxidants:

  • It contains Beta- Carotenes which increases protection against many forms of cancer, including lung, bladder, rectal, oral and dermal (skin) cancers.
  • Vitamin C, a powerful free radical scavenger.
  • Vitamin E, fights infection, promotes healing and helps in prevention of lung and gastro-intestinal cancer.

The Repository of Essential Elements:

Wheatgrass is a rich source of chlorophyll, magnesium, potassium, calcium, sodium, Iron, selenium, zinc, chromium, vitamin B12, folic acid, pyridoxine and other minerals which are essential to sustain the biochemical balance of body.

The Gratifying Green Blood:

Wheatgrass juice contains up to 70 % Chlorophyll. The potential benefits of Chlorophyll include improving health, boosting energy, anti-aging remedy, fighting illnesses, detoxification, deodorization, in ulcer and the healing of wounds.

Presence of Essential Amino Acids-

The 8 essential amino acids which your body can’t produce are found in Wheatgrass. All at one place!

How to grow Wheatgrass in 5 easy steps!

WE propound few easy steps to grow this superfood indoor effortlessly from the wheat kernels. 

Raise your Wheatgrass in 5 easy steps:

1. Soak the Seeds:

Soaking triggers the germination of seeds. Soak the seeds overnight. At the end of the process, a tiny root will emerge out.

2. Pick a shallow container or a seed tray:

Fill the container up to 3/4th level with cocopeat or soil as per the availability.

 3. Sow the seeds:

Spread the wheat seeds evenly on the surface.  For a dense growth, keep the distance among the seeds less. Cover the seeds with a thin layer of cocopeat/soil. Sprinkle some water to make the medium moist. Place the container in a shadddy area. 

Check twice a day to ensure that the media is not drying out.

4. Germination:

After 2-4 days tiny seedlings begins to shoot up and a little blade of grass emerges out.  At this stage relocate the container to an area where it can receive partial sunlight. Water it daily as lack of water results in withering of grass.

      Be careful of keeping the media moist but not waterlogged as it may invite unwanted fungus to flourish.

5. Harvest:

Within 5-7 days seedlings grow about 15-20 cm. Wheatgrass will be ready to harvest and detoxify your body when the grass begins to fork or induce a new blade. Trim the grass with a scissor just above the media. 

     Wheatgrass can be harvested up to two cycles. 

Inculcate Wheatgrass in your Diet:

A refreshing Wheatgrass juice would give your day a perfect start. If your Palate resists eating raw wheatgrass than make a scrummy smoothie or make wheatgrass powder and mix it in fruit juice.

           ” It is venerated as an auspicious plant in Indian Tradition. Wheatgrass has accrued such homage only in view of its nutritional & medicinal properties. No wonder the wheatgrass is a complete health tonic. Rejuvenate your body with a sip of wheatgrass juice. ”

WE hope this information will embolden you to grow wheatgrass at your home! 

Posted on Leave a comment

Vegetable seed sowing calendar for India

When the cold breezes of Winter evanesce, the flowers of luscious mango begins blooming and Earth welcomes the Summer joyously. When the scorching sun dries off all the grain, Rain refurbishes the barren land and re-hydrates the water reservoirs. As the weather changes across the globe, each season brings plethora of gifts in the form of fruits, vegetables and cereals to the mankind. Every Season is a bouquet of varieties of fruits & vegetables with multifarious nutrients, earthy fragrance and subtle savour. The onset of a new season provides liberty to do experiments with culinary dishes, trying new recipes and bringing traditional seasonal dishes from grandma’s diary to the kitchen. 

Classifying vegetables according to the season is an Ancient Indian Practice.  Ritucharya is a concept of eating seasonally mentioned in Ayurveda. Ranging from Vasant Ritu (Spring) to Sharad Ritu (Winter), it briefly describes what to eat during each season to retain health and counteract diseases. The sowing schedule for Indian crops depends upon the weather that the vegetable can best tolerate.

A seasonal vegetable not only dazzles your taste goblet but there are plenty health benefits. Such as:

  • Utterly Delicious-

This fresher seasonal produce tastes much better than an out-of-season tasteless, flavorless and less juicy vegetable.

  • Satiates the body’s natural nutritional requirements:

Vegetables grown in appropriate season are more nutritionally dense. In winter, citrus fruits and vegetables are found in abundance. These are particularly high in “vitamin C”, an antioxidant responsible for boosting immunity. It is the matter of fact that immune system is weaker during winter. Whereas summer fruits and vegetables are rich source of beta carotene and other carotenoids that provides us a shield against sun damage.

Listen What Seasonal Chart Says!

As a Home gardener, Do you want to to eat seasonally but confuse about what and when to grow? Then pick a right vegetable for the right season as per the vegetable growing schedule. Grow your food seasonally at home to get nutritious and pesticides free produce.

Top vegetable to grow in the kitchen garden in India:

  • January:

Brinjal, Bitter Gourd, Bottle Gourd, Capsicum, Cucumber, Okra, Radish, Tomato, Pumpkin, Melon

  • February:

Applegourd, Bittergourd, Bottle Gourd, Cucumber, French Beans, Okra, Sponge Gourd, Watermelon, Spinach, Capsicum, Okra, Tomato, Pumpkin

  • March:

Applegourd, Bittergourd, Bottle Gourd, Cucumber, French Beans, Okra, Sponge Gourd, Watermelon, Spinach, Onion, Pumpkin

  • April:

Capsicum, Onion

  • May:

Onion, Pepper, Brinjal, Capsicum, Okra, Pumpkin

  • June:

All Gourds, Brinjal, Cucumber, Cauliflower, Okra, Onion, Sem, Tomato, Pepper, Cabbage, Capsicum, Pumpkin, Melon

  • July:

All Gourds, Cucumber, Okra, Sem, Tomato, Cabbage, Cauliflower, Pumpkin, Melon

  • August:

Carrot, Cauliflower, Radish, Tomato, Broccoli

  • September:

Cabbage, Carrot, Cauliflower, Peas, Radish, Tomato, Lettuce, Broccoli, Cucumber, Onion, Spinach, Pumpkin, Corn

  • October:

Beet root, Brinjal, Cabbage, Cauliflower, Lettuce, Peas, Radish, Spinach, Turnip, Capsicum, Carrot, Cucumber, Okra, Onion, Tomato, Potato, Pumpkin, Corn, Melon

  • November:

Turnip, Tomato, Radish, Pepper, Peas, Beet Root, Bitter Gourd, Bottle Gourd, Cabbage, Capsicum, Carrot, Okra, Spinach, Potato, Pumpkin, Corn, Melon

  • December:

Tomato, Bitter Gourd, Bottle Gourd, Cucumber, Lettuce, Okra, Radish, Potato, Pumpkin, Melon

             Consuming more fresh fruits & vegetables procured from your kitchen garden is one of the most important and easiest things you can do to stay healthy. When you pluck vegetables right from your home garden and serve in your plates, the nutritional content will be adequate. Grow your food seasonally at home to get nutritious and pesticides free produce.

Posted on Leave a comment

6 Seeds that every kitchen has: Create a Kitchen Garden from the Seeds of your Kitchen Cabinet

In the olden days, backyards were used for growing a variety of vegetables depending upon the season. Lush green garden, flavorful fruits and vegetables hanging on the branches gave immense pleasure and potential health benefits. As the wheel of time spins ceaselessly to give way to a new era, pesticides dusted vegetables at reasonable prices and scantiness of time has replaced home-grown vegetables.

Kitchen Garden: A Revolutionary Concept 

A Kitchen Garden is an area dedicated to growing herbs, fruits and vegetables for household consumption. Be it native or exotic, many vegetables can be cultivated to make culinary delights.

#Grow your own Vegetable

The wheel of time has spun again, and the populaces have recognized the detrimental effects of consuming pesticide-dusted vegetables. It bolstered the “#Grow Your Own Vegetable” approach and encouraged folks to establish a Kitchen Garden. And growing your own vegetables is fun as well as rewarding.

Rewards of growing veggies at home

The garden-fresh, crispy veggies will tickle your taste buds, save your pennies and proffer delicacy to your delicious dishes. Apart from being inexpensive, the satisfaction of growing your own vegetables is undeniably high. 

6 Seeds that every kitchen has-

Our quest for the easily available seeds ended up in the Kitchen. Following seeds are recommended for setting a kitchen garden as they have a special place in every kitchen cabinet:

  1. Coriander (Dhaniya)
  2. Fenugreek (Methi)
  3. Mustard (Sarson)
  4. Chick Pea (Kabuli Chana)
  5. Chillies (Mirchi)
  6. Pea (Matar)

6 Simple Steps to GROW:

  1. 1. Collecting the Seeds:
  2.  All the seeds can be found in canisters placed in your cabinets, forbye chilli seeds. To extract chilli seeds, slit open an unripe chilli with a sharp knife and release the seeds from it by using your fingers. Alternatively, dried red chillies can be used. Air-dry the seeds.
  3. 2. Soaking:
  • Soaking the seeds before planting is a gardening hack that every old gardener would suggest. To expedite seed germination, soak the seeds in a container before sowing. It ensures that the germination time is reduced. 
  • Does every seed require soaking?
  • Seeds such as tomato, chilly, fenugreek, mustard, peas, coriander, beans, etc. that have hard coats are required to be soaked.
  • for Soaking: 12-24 hours
  • Prefer water just warmer than your body temperature
  1. 3. Pick a Pot:
  2. Fill up the pot or container 3/4th with a mixture of coco peat and perlite. It makes gardening effortless and lighter. Furthermore, it provides a porous media to plant roots. 
  3. 4. Sow the Seeds:
  • Prick the cocopeat media with your finger about an inch i.e. the first joint of an index finger at the equidistance. At the moment first thing to note is that except coriander and fenugreek, all the other four varieties of seeds should be grown in a small container initially. Place a single seed in each hole. Then sprinkle some cocopeat to cover the seeds for germination. Sprinkle small amount of water to keep them moist. Monitor the progress daily. Be careful of keeping the cocopeat moist but not waterlogged.
  • 5. Transplantation:
  • When the seedlings become 2-3 inches tall bearing a set of seed leaves and true leaves, it indicates that it is time to transplant the seedlings into a bigger pot. 
  • Feed the plant with nutrients and water. Either use organic manure or nutrient solution to provide necessary growth nutrients to satiate the growing needs of the plant.
  1. 6. Harvest:
  2. The sweet fruit of our hard work is ready in the form of fresh and aromatic garden vegetables! The long-awaited moment is reaping the crop. The technique and time of harvesting vary with the nature of crops. For instance:
  • Coriander: 

coriander crops will mature in 40-45 days. Harvest coriander by plucking individual leaves and stems from the base of the plant. The plant will flourish up to two or three more cycles.

  • Fenugreek:

It is a fast-growing annual having an enticing flavor and will produce leaves that are ready to harvest within just 20-30 days of sowing. Perpetual harvests can be expected until the plant begins to blossom.

  • Mustard:

Requires 30-40 days to reach the harvesting stage. The reaping should be done when the leaves are younger & tender.

  • Chickpea

Requires about 100 days to reach the harvesting stage.

  • Chillies:

It requires about 120 Days to reach harvest. Chillies can be plucked 8-10 times while the ripe ones can be plucked 5-6 times.

  • Peas

Takes about  60 to 70 days to harvest after planting. The maturation of Peas occurs very quickly. Keep your peas well picked to foster the development of more pods.

Garden to the Plate:

These crops possess a tremendous amount of qualities. Chillies are a rich source of Vitamin A, B, C, and E while peas are an excellent source of protein and fiber. Fenugreek helps in lowering blood sugar levels, boosting testosterone and reduces cholesterol, etc. Mustard contains magnesium and selenium, an element known for its anti-inflammatory effect. Coriander is extensively used due to its medicinal properties. Green Chickpeas are also a rich source of proteins and vitamins A and C.

Savour the flavour of “Sarson Da Saag” (Indian subcontinental dish made by using mustard greens), “Methi ki Bhaaji” (Fenugreek Greens) and Chane ki bhaaji (Chickpea greens). Garnish your dishes with aromatic coriander leaves and spice it up with hot chillies. Do experiment with sweet peas. 

WE hope this information will help you to establish your own wonderful kitchen garden in the kitchen windowsill, backyard or corridor. Once you grow the plants, you’ll be rewarded with green fresh vegetables all year long!

Posted on Leave a comment

Microgreens : Bunch of Nutrients

The biggest health challenge of the 21st century is the scarcity of nutritious food for all. With the exploding population and rising food demand, agriculture lands are under extreme pressure to produce food beyond their capacity which led to overutilization of chemical fertilizers, pesticides, and injectable. Consequentially, these detrimental ingredients have percolated in our regular diet. Amidst this hustle and bustle of life, Microgreens have emerged as a SUPERFOOD to curb increasing nutritional deficiency.

What are Microgreens?

Microgreens can be defined as the tiny seedlings that are approximately 1-3 inches tall which are grown to be harvested at the seed leaf/true leaf stage of its growth cycle. These are the miniature versions of large plants packed with a higher amount of phytonutrients and minerals and lower nitrate as compare to its older or macro version. The vitamin content can be many times that of a mature plant. Due to their small size, they are known as Microgreens. In Microgreen Farming, more nutrients can be harvested per inch of growth medium. Microgreens have an aromatic flavor and concentrated nutrient content.

Why Microgreens?

Nutritious Delight:

The Bio-availability of essential nutrients is higher in microgreens compared to the mature plants. While their nutrient contents vary slightly most varieties tend to be rich in potassium, iron, zinc, magnesium, and copper. It is a mine of antioxidants, vitamins and other essential compounds such as polyphenols. For instance, Red Cabbage Microgreens have 40 times more Vitamin E, 6 times more vitamin C & 69 times more vitamin K than the mature red cabbage.

Easy to grow at home:

Growing Microgreens is not intricate. It can be taken up as a fun project for kids. All you need is a container, soil/cocopeat, and seeds. It neither requires humongous space nor intensive labor. 

These come handy and are easier to be incorporated in the diet than the equal amount of vegetables.

Bring the taste of fine dining restaurants into your plate:

Have you been to a fine dining restaurant recently? Exotic dishes are being garnished by tiny, delicate, and flavorful Microgreens to make it delectable. 

Healthier Substitute of Chlorophyll Supplements:

The potential benefits of Chlorophyll include improving health, boosting energy, anti-aging remedy, and fighting illnesses. A popular way to get chlorophyll into the diet is through supplements in the form of drops, pills or capsules. On the contrary, Microgreens are the rich source of chlorophyll for e.g. Spinach, broccoli, green cabbage & alfa-alfa can be added in the diet.

Microgreens can be inculcated in the regular meals in very innovative ways.  “Use them as toppings for your sandwiches, salad or garnishings.” This will impart your home-cooked meal a nutritious & flavourful bite. 

Is Sprout and Microgreen Same?

Microgreens are frequently compared with sprouts and sometimes even misinterpreted as sprouts. However, both are different. Sprouts do not have leaves and also have a much shorter growing cycle. Whereas microgreens are more similar to baby greens whose stem and leaves are eaten.

What to Grow?

Thrilled with the qualities of small but powerful pack of microgreens but confused at the same time that what to grow? Microgreens can be grown from many different types of seeds in a small space.  Mentioned below are 15 super easy grown crops loaded with numerous health benefits.

  • Wheatgrass
  • Barley
  • Mustard
  • Sunflower
  • Onion
  • Radish
  • Carrot
  • Basil
  • Spinach
  • Fenugreek
  • Broccoli
  • Pea
  • Cabbage
  • Beetroot
  • Moong

How to Grow Microgreens:

  • Cover the bottom of the container with an inch or two of moistened Cocopeat. Flatten and level it with your  hand. Scatter seeds evenly on top of the cocopeat. Cover the seeds with a thin layer of Cocopeat. Sprinkle some water. Keep the container in a shady area. While waiting for sprouts to appear, usually within three to seven days, sprinkle  water once or twice daily to keep the cocopeat moist but not wet.
  • Once seeds have sprouted, allow seedling to grow in partial sunlight.
  • Harvest the seedlings through scissor or cutter just above the soil  in seed leaf or true leaf stage as per need of the crop. Usually, Microgreens are harvested in 7-10 days.

Crunchy, fresh, and juicy microgreens are ready to pamper your palates!


When to Harvest?

Depending upon the type of seed sown, Microgreens can be harvested between 7-21 days. Some of them are plucked immediately after the appearance of seed leaves and some of them after the appearance of the first set of the true leaf. Let the aroma of microgreens heal your body.

“Microgreens are the wonder of Nature”